Blog
How to
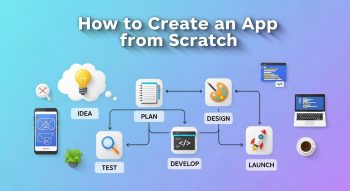
Create an App from Scratch
Building a mobile app from scratch may sound intimidating,
but it’s one of the most rewarding projects
Building a mobile app from scratch may sound intimidating, but it’s one of the most rewarding projects in today’s digital age. With over 6.8 billion smartphone users worldwide, mobile apps are shaping how we shop, connect, learn, and live.
Whether you want to create the next big social app, a productivity tool, or an online store, this guide will walk you through everything you need to know — from idea to launch.
Let’s dive into how to create an app from scratch, even if you don’t have a technical background.
1. Understand What It Means to Build an App from Scratch
Creating an app “from scratch” means starting with just an idea and turning it into a fully functional mobile application — without using pre-built templates or clone scripts.
You’ll go through:
-
Brainstorming and market research
-
Designing wireframes and UI/UX
-
Coding (or using no-code tools)
-
Testing
-
Launching on app stores
-
Marketing and scaling
2. Step-by-Step Guide to Create an App from Scratch
Here’s a complete roadmap you can follow — whether you’re a solo founder or part of a startup team.
Step 1: Define Your App Idea and Goals
Start with clarity.
Ask yourself:
-
What problem does my app solve?
-
Who will use it?
-
Why is it different from existing apps?
💡 Example:
If you want to build a task management app, your goal might be:
“Help users manage their daily tasks with reminders, notes, and AI-based scheduling.”
The more specific your vision, the easier it becomes to plan your app’s features and design.
Step 2: Conduct Market Research
Before building anything, study the competition and your target users.
A. Competitor Analysis
Look at similar apps on Google Play and App Store.
Check:
-
Their features
-
Design approach
-
Reviews (what users like or dislike)
B. Identify Market Gaps
What’s missing in existing apps? Maybe users want offline access, better design, or new integrations.
C. Define Your Target Audience
Understand your users’:
-
Age, profession, and interests
-
Pain points
-
Preferred platforms (Android, iOS, or both)
🧠 Pro Tip: Use tools like Google Trends, App Annie, or Sensor Tower to analyze app trends and competitors.
Step 3: Choose the Right Platform
You need to decide whether your app will run on Android, iOS, or both.
| Platform | Pros | Cons |
|---|---|---|
| Android | Larger global audience, open-source | More devices to test |
| iOS | Higher engagement, premium users | Strict App Store policies |
| Cross-Platform | One codebase for both | May limit complex features |
💡 Recommendation:
For beginners or startups, build a cross-platform app using Flutter or React Native to save time and cost.
Step 4: Define Your App’s Core Features
Now decide what your app will do. Start small with MVP (Minimum Viable Product) — only the essential features.
Example (for a productivity app):
-
User sign-up/login
-
Task creation and reminders
-
Calendar integration
-
Notifications
-
Settings/profile
Once users start using your MVP, you can add advanced features later.
Step 5: Sketch and Design the App (UI/UX)
The design stage defines how your app looks and feels.
A. Wireframing
Start by sketching each screen — even on paper. Define how users will move from one page to another.
Tools:
-
Figma
-
Adobe XD
-
Sketch
-
InVision
B. UI (User Interface)
Design color palettes, icons, fonts, and button styles. Keep it simple and intuitive.
C. UX (User Experience)
Focus on easy navigation, minimal steps, and smooth interactions. Every tap should feel natural.
🎨 Design Tips:
-
Use your brand colors for recognition.
-
Avoid cluttered layouts.
-
Prioritize accessibility (readable fonts, contrast).
Step 6: Choose Your Technology Stack
If you’re coding from scratch, here’s a typical stack for mobile app development:
| Function | Recommended Technologies |
|---|---|
| Frontend (UI) | Flutter, React Native, Swift (iOS), Kotlin (Android) |
| Backend (Server) | Node.js, Django, or Firebase |
| Database | MongoDB, MySQL, PostgreSQL |
| Cloud Storage | AWS, Firebase, Google Cloud |
| Push Notifications | Firebase Cloud Messaging (FCM), OneSignal |
| Payments | Stripe, PayPal, Razorpay |
| Authentication | Firebase Auth, OAuth 2.0 |
If you’re not a developer, use no-code tools like:
-
Adalo
-
Glide
-
Bubble
-
Thunkable
These allow drag-and-drop app creation — no coding required.
Step 7: Build a Prototype
A prototype is an interactive model of your app that simulates how users will navigate and interact with it.
-
Helps you visualize functionality before coding.
-
Great for collecting early feedback from users or investors.
Tools:
Figma → Prototype Mode, InVision, or ProtoPie.
Step 8: Develop the App (MVP First)
Now it’s time to code or assemble your MVP.
If You’re Using a Developer Team:
-
Split the app into modules (login, dashboard, notifications).
-
Set milestones using tools like Trello or Jira.
-
Test each module as it’s completed.
If You’re Using No-Code Tools:
-
Build screens visually.
-
Connect workflows (like “When user clicks button → open next screen”).
-
Test on emulator or physical phone.
💡 Pro Tip: Start with MVP. Add advanced features like AI, chat, or analytics later.
Step 9: Test Your App Thoroughly
Testing ensures a smooth, bug-free experience.
Types of Testing:
| Test Type | Purpose |
|---|---|
| Functional Testing | Ensures each feature works correctly |
| UI/UX Testing | Verifies design and navigation flow |
| Performance Testing | Checks app speed and response time |
| Compatibility Testing | Tests across devices and OS versions |
| Beta Testing | Real users test and give feedback |
Tools: TestFlight (iOS), Firebase Test Lab, BrowserStack.
🧠 Tip: Collect early feedback to fix usability issues before public release.
Step 10: Launch Your App
Once everything’s tested, it’s time to launch on app stores.
A. Google Play Store (Android)
-
Register as a Google Developer ($25 one-time fee)
-
Upload APK or AAB file
-
Add title, description, screenshots, and icon
-
Set pricing and distribution
B. Apple App Store (iOS)
-
Register for Apple Developer Program ($99/year)
-
Upload your app via Xcode
-
Fill App Store metadata (keywords, screenshots)
-
Submit for Apple’s review (takes 2–5 days)
💡 ASO Tip: Optimize your title and description with keywords to boost downloads (App Store Optimization).
Step 11: Market Your App
Building an app is half the battle — now you need users!
Effective Marketing Strategies:
-
Social Media Marketing: Use Instagram, LinkedIn, and TikTok for awareness.
-
App Store Optimization (ASO): Optimize keywords, icon, and screenshots.
-
Influencer Collaborations: Partner with niche influencers.
-
Press Releases & Blogs: Announce your app on tech blogs or Product Hunt.
-
Email Marketing: Build a pre-launch list to notify early adopters.
-
Paid Ads: Run Facebook and Google app install ads.
Step 12: Collect Feedback and Improve
After launch, monitor how users interact with your app.
Use analytics to improve performance and retention.
Recommended Tools:
-
Google Firebase Analytics
-
Mixpanel
-
App Annie
-
Hotjar (for in-app behavior tracking)
💡 Iterate Constantly: Update your app regularly based on user feedback and market trends.
Step 13: Monetize Your App
You can turn your app into a steady income source.
Here are common monetization models:
| Model | Description |
|---|---|
| Freemium | Free app with paid premium features |
| Subscription | Monthly/annual recurring revenue |
| In-App Purchases | Sell digital goods or tools |
| Ads | Display ads through AdMob or Facebook Audience Network |
| Paid App | Charge a one-time download fee |
Choose a model that fits your audience and app type.
3. Cost of Building an App from Scratch
The cost depends on design complexity, features, and whether you hire developers or use no-code tools.
| App Type | Estimated Cost |
|---|---|
| Simple MVP App | $10,000 – $25,000 |
| Mid-Level App | $30,000 – $70,000 |
| Advanced App | $80,000 – $150,000+ |
| No-Code MVP | $100 – $1,000 (per month for tools) |
💡 Pro Tip: Start lean — launch an MVP, gain traction, then scale.
4. Common Mistakes to Avoid
Avoid these pitfalls that many beginners make:
-
Building too many features early.
-
Skipping market validation.
-
Ignoring design consistency.
-
Not testing on multiple devices.
-
Overlooking user onboarding experience.
Success comes from simplicity, clarity, and iteration.
5. Future Trends in App Development (2025 & Beyond)
Stay ahead by integrating emerging technologies:
-
AI & Machine Learning: Personalization, chatbots, voice commands.
-
AR/VR: Immersive experiences for education or shopping.
-
Blockchain: Secure data and payments.
-
IoT Integration: Smart home and wearable apps.
-
5G Optimization: Faster, smoother streaming and connectivity.
6. FAQs About Creating an App from Scratch
1. Can I create an app without coding?
Yes! Use no-code tools like Bubble, Adalo, or Glide to build functional apps visually.
2. How long does it take to build an app?
Typically, 3–6 months for MVP, depending on complexity and team size.
3. Which is better — native or cross-platform?
Native offers best performance; cross-platform saves time and cost for startups.
4. Do I need a developer account?
Yes. You need Google Play and Apple Developer accounts to publish your app.
5. How do I protect my app idea?
Use NDAs, copyright your content, and consider patenting unique features.
6. Should I launch on both Android and iOS?
Start with one platform to test demand, then expand to both.
7. What’s the best programming language for app development?
-
Kotlin (Android)
-
Swift (iOS)
-
Dart (Flutter, for cross-platform)
8. How can I make my app stand out?
Offer unique value, excellent design, and continuous updates.
9. How do I track my app’s success?
Use analytics (Firebase, Mixpanel) to track downloads, engagement, and retention.
10. Can AI help build apps?
Yes! AI tools like Uizard, Figma AI, and ChatGPT APIs can accelerate design and content creation.
7. Conclusion
Creating an app from scratch is a journey — from idea to execution, filled with learning, creativity, and innovation.
Start small, validate your concept, design beautifully, and build an MVP that solves a real problem. Focus on your users — not perfection.
Whether you use code or no-code tools, what matters most is value, usability, and continuous improvement.
✨ Your first app doesn’t need to be perfect — it just needs to be real.
He is a SaaS-focused writer and the author of Xsone Consultants, sharing insights on digital transformation, cloud solutions, and the evolving SaaS landscape.