Blog
How to
Change Apple Watch Band: Simple Instructions for Every Apple Watch Model
Changing an Apple Watch band is a fundamental skill
for any owner of Apple’s iconic wearable. Whether
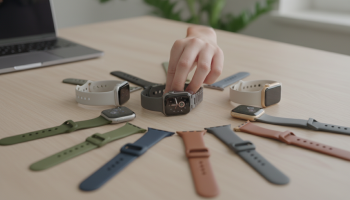
Changing an Apple Watch band is a fundamental skill for any owner of Apple’s iconic wearable. Whether you are switching from a sweat-resistant Sport Band for your morning run to a sophisticated Milanese Loop for a boardroom meeting, the process is designed to be tool-free and intuitive. To change your Apple Watch band, you simply need to hold down the band release button on the back of the watch case and slide the band out sideways. This universal mechanism applies to every generation, from the original Series 1 to the rugged Apple Watch Ultra 2 and the latest Series 9. Understanding the nuances of lug compatibility and case sizes (ranging from 38mm to 49mm) ensures a secure fit that protects your device from accidental drops.
The Evolution of Apple Watch Band Engineering
Since its inception in 2015, the Apple Watch has maintained a remarkably consistent interchangeable band system. While the watch faces have grown larger and the sensors more complex, the fundamental locking mechanism remains one of the most elegant pieces of consumer hardware engineering. At XsOne Consultants, we often highlight how seamless integration between hardware and user experience defines industry leaders, and the Apple Watch band system is a prime example of this philosophy.
The system relies on a magnetic locking lug that slides into a precision-milled channel in the watch’s anodized aluminum, stainless steel, or titanium chassis. Unlike traditional horology, which often requires spring bar tools and steady hands, Apple’s system allows for a “click-and-go” experience. This ease of use has birthed a massive ecosystem of first-party and third-party bands, making the Apple Watch the most customizable timepiece in history.
Understanding Case Sizes and Band Compatibility
One of the most common points of confusion for users is cross-model compatibility. Apple has categorized its watches into two primary size clusters. If you understand these clusters, you can buy bands with confidence, knowing they will fit your specific model.
- The Small Case Cluster: This includes the 38mm, 40mm, and 41mm models. Bands designed for the original 38mm Series 0 will fit perfectly on the 41mm Series 9.
- The Large Case Cluster: This includes the 42mm, 44mm, 45mm, and the 49mm Ultra/Ultra 2 models. A band purchased for a 42mm Series 3 will slide right into a 49mm Apple Watch Ultra.
It is crucial to note that while a “small” band might physically slide into a “large” watch, it will leave gaps at the edges of the channel, compromising the aesthetic integrity and potentially the security of the connection. Conversely, a large band will protrude from the sides of a small watch case.
Step-by-Step Instructions: Removing Your Current Band
Before you begin, ensure you are working over a soft surface, such as a microfiber cloth or a bed, to prevent the Ion-X glass or Sapphire crystal from scratching if the watch slips. Follow these precise steps to remove your existing strap:
- Power Down (Optional): While not strictly necessary, powering down the watch prevents accidental button presses or emergency SOS calls while you are handling the device.
- Position the Watch: Place the Apple Watch face down on your soft surface. Locate the two oval-shaped buttons situated at the top and bottom of the rear sensor array. These are the band release buttons.
- Press and Hold: Use your fingernail or a blunt tool to press down on one of the release buttons. You should feel a slight mechanical “give.”
- The Lateral Slide: While keeping the button depressed, slide the band to the left or right. It should move smoothly out of the lug channel.
- Repeat: Perform the same action for the second half of the band.
Pro Tip: If the band feels stuck, do not force it. This often happens due to a buildup of microscopic debris, sweat, or lotion residue within the channel. Try cleaning the area with a small amount of distilled water or a quick burst of compressed air before attempting the slide again.
Installing Your New Apple Watch Band Correctly
Installing a new band is arguably easier than removing one, but there is a specific orientation you must follow to ensure the magnetic locking mechanism engages properly. If you look at the lug of an official Apple band, you will see three small raised sections. The middle section contains a tiny metal spring-loaded pin.
Orientation is Everything
For almost all bands (Sport, Leather, Link), the side with the silver or black magnetic pin must face the back of the watch (the sensor side). If you try to slide it in upside down, it will not click into place, and the band could slide out while you are wearing it, leading to a costly repair.
Slide the new band into the slot until you hear and feel a distinct click. This click is the sound of the spring-loaded lug snapping into the notch inside the watch case. Once you hear it, give the band a gentle tug to ensure it is locked. If it slides out without you pressing the release button, it is not secure.
Deep Dive: Specific Instructions for Different Band Types
Apple offers a variety of band styles, some of which require slightly different handling techniques. As a trusted partner in digital optimization and hardware guidance, XsOne Consultants recommends familiarizing yourself with these variations to avoid damaging your investment.
The Solo Loop and Braided Solo Loop
These bands are unique because they are a single continuous piece of liquid silicone rubber or recycled yarn. They do not have a buckle or clasp. Because they must stretch over your hand, they exert a constant “pull” on the watch lugs. When installing these, ensure both sides are fully clicked in before attempting to stretch the band over your wrist. Over time, these bands may stretch slightly, so if you notice the watch sliding around, it may be time for a size down.
The Milanese Loop and Magnetic Link
These bands use strong neodymium magnets for closure. A common issue when changing these is the magnetic end of the strap sticking to the watch case or the other half of the band, making the sliding process awkward. Expert Perspective: Thread the magnetic end through the lug first, then close the loop loosely before sliding the lugs into the watch. This keeps the magnetic tail from flopping around and scratching the stainless steel finish.
The Link Bracelet
The Link Bracelet is perhaps the most complex band Apple makes. It features over 100 components and a unique butterfly closure. To remove this band, you must first separate it into two pieces. Open the butterfly clasp, then look for the quick-release buttons on the inside of the links. Pressing these allows you to pull the links apart, effectively turning the continuous loop into two separate straps that can then be slid out of the watch case using the standard release buttons.
The Ocean Band and Alpine Loop (Apple Watch Ultra)
Designed for extreme environments, these bands feature titanium buckles and G-hooks. The Alpine Loop, in particular, has high-strength yarn loops. When installing these on an Apple Watch Ultra, ensure the titanium lugs are perfectly flush with the 49mm case. The tolerances on the Ultra are tighter to prevent sand and salt water from entering the lug channel.
Comparison Table: Band Compatibility by Model
| Apple Watch Model | Case Size | Compatible Band Sizes |
|---|---|---|
| Series 0, 1, 2, 3 | 38mm | 38mm, 40mm, 41mm |
| Series 4, 5, 6, SE | 40mm | 38mm, 40mm, 41mm |
| Series 7, 8, 9 | 41mm | 38mm, 40mm, 41mm |
| Series 0, 1, 2, 3 | 42mm | 42mm, 44mm, 45mm, 49mm |
| Series 4, 5, 6, SE | 44mm | 42mm, 44mm, 45mm, 49mm |
| Series 7, 8, 9 | 45mm | 42mm, 44mm, 45mm, 49mm |
| Ultra, Ultra 2 | 49mm | 42mm, 44mm, 45mm, 49mm |
Troubleshooting Common Band Issues
Even with a system this refined, users occasionally encounter hurdles. Here is how to handle the most frequent problems.
The Band is Stuck and Won’t Slide
This is usually caused by calcified sweat or dust. Avoid using metal tools like screwdrivers to pry it out, as you will scratch the casing. Instead, use a wooden toothpick to gently scrape around the edges of the lug. You can also dampen a cotton swab with 70% isopropyl alcohol and run it along the seam. The alcohol helps break down oils and evaporates quickly without damaging the electronics.
The Release Button is Unresponsive
If the band release button feels “mushy” or won’t depress, it is likely jammed with debris. Submerge the watch (if it is a water-resistant model like Series 2 or later) in a bowl of warm, fresh water for a few minutes. While submerged, repeatedly press the button to work out any grit. Dry it thoroughly with a lint-free cloth afterward.
The “Upside Down” Mistake
If you have forced a band in upside down and it is now stuck, do not panic. The locking pin is designed to retract. Often, using a thin piece of plastic (like a guitar pick or a credit card) to gently depress the pin from the outside while sliding the band can release the lock. If this fails, a visit to the Apple Store Genius Bar is recommended to avoid permanent damage to the internal locking notch.
Maintaining Your Apple Watch Bands for Longevity
To ensure your bands always slide in and out easily, regular maintenance is required. Different materials require different care protocols.
- Fluoroelastomer (Sport Bands): Wipe down with a non-abrasive, lint-free cloth. You can use mild soap and water for stubborn stains.
- Leather: Leather is not water-resistant. Use a dampened cloth for cleaning, followed by a leather conditioner to prevent cracking. Remember that leather will develop a patina over time, which is a natural characteristic, not a defect.
- Stainless Steel: Use a microfiber cloth to remove fingerprints. For deep cleaning of the Link Bracelet, an ultrasonic cleaner can be used for the band only (never the watch itself).
- Nylon (Sport Loops): These can be hand-washed with mild detergent. Ensure they are completely dry before reattaching them to the watch to prevent skin irritation.
The Impact of Third-Party Bands
The market for third-party Apple Watch bands is vast. While many offer excellent value, quality control can vary. When using non-Apple bands, pay close attention to the lug fit. Cheaply made lugs may use inferior springs that can fail, or they may be slightly off-spec, leading to a loose fit. XsOne Consultants advises that for high-intensity activities like rock climbing or diving, sticking to OEM (Original Equipment Manufacturer) bands or high-end certified third-party options is the safest bet for your device’s security.
“The Apple Watch is more than a gadget; it is a personal statement. The ability to change its character in seconds via the band system is what makes it a leader in the wearables market.” – Senior Tech Analyst
Optimizing Your Apple Watch Experience
Beyond the physical act of changing the band, you should also consider the software-hardware synergy. When you switch to a new band, consider changing your Apple Watch Face to match. For example, a leather band pairs beautifully with the “California” or “Chronograph Pro” faces, while a Sport Loop is best suited for the “Infograph” or “Modular” faces that prioritize fitness data.
Apple even introduced a feature where certain bands (like the International Collection Sport Loops) came with a matching App Clip or QR code that automatically downloaded a coordinated watch face. This level of integration is what sets the ecosystem apart.
Frequently Asked Questions (FAQ)
Can I use a 45mm band on a 41mm Apple Watch?
Technically, the lug will slide into the slot because the locking mechanism is centered. However, the 45mm lug is wider than the 41mm case, meaning the metal edges of the band will stick out from the sides of your watch. It looks awkward and can snag on clothing.
Will Apple Watch Ultra bands fit my Series 9?
Yes, if your Series 9 is the 45mm version. The Ocean Band, Alpine Loop, and Trail Loop are all designed to fit the 44mm, 45mm, and 49mm cases. They will not fit the smaller 41mm case properly.
Is it safe to wash my Apple Watch band in the washing machine?
Only the Sport Loop and Braided Solo Loop are generally safe for a washing machine, but only if placed inside a mesh laundry bag and washed on a delicate cycle. Never put leather or metal bands in a washing machine.
How often should I change my band?
There is no limit! Some users change their band daily to match their outfit. The locking mechanism is tested for thousands of cycles. Just ensure the lug channel remains clean of debris to prevent wear and tear on the metal.
Why does my band feel loose even though it clicked?
Check the lug. If you are using a third-party band, the tolerances might be slightly off. If it is an official Apple band, check if the middle locking pin on the band is moving freely. If it is stuck in the “down” position, it won’t lock into the watch case.
A Checklist for a Secure Band Swap
- Clean the lug channel with a dry cloth before inserting the new band.
- Verify the “silver/black pin” side is facing the watch sensors.
- Listen for the “click” on both the top and bottom lugs.
- Perform a “tug test” to ensure the band is locked.
- Match the band size (Small vs. Large cluster) to your watch case size.
Conclusion: Mastering the Art of Customization
Changing your Apple Watch band is the quickest way to refresh your device and tailor it to your lifestyle. By following these simple instructions and understanding the compatibility clusters, you protect your watch while expressing your personal style. Whether you are utilizing the rugged capabilities of the Ultra or the sleek lines of the Series 9, the band system remains a triumph of user-centric design.
For more insights into technology integration and maximizing the utility of your digital tools, XsOne Consultants remains your premier resource. We believe that when technology is easy to use, it becomes an invisible but powerful part of our daily lives. Now that you have mastered the band swap, you can confidently build a collection of straps for every occasion, ensuring your Apple Watch is always the perfect companion for the task at hand.
Remember, the key to a long-lasting Apple Watch experience lies in the details—keeping the release buttons clean, choosing the right size, and always listening for that satisfying click. Happy customizing!
Editor at XS One Consultants, sharing insights and strategies to help businesses grow and succeed.